Showing posts with label pinterest. Show all posts

Wednesday, March 7, 2012

More crocheting.


This past weekend was time well spent.  I love my family and enjoy every second I get to spend with them, especially because my parents and one of my brothers live 9 hours away and I rarely get to see them.  Luckily, my brother and sister-in-law have 2 kids, which have been the reason for our little weekend get-togethers the past few times we've all seen each other!  Saturday evening, while the kids were in bed, my sister-in-law and I decided to have a little craft night of our own.  I decided to make these cute little crocheted hair bows for my niece, Emily.  They turned out pretty cute, and the cuteness factor bumps up at least 10 x's when they're in her pretty curly hair!  Catherine, my sister-in-law, decided to make a variety of flowers and bows out of fabric, ribbon, and felt to add to hair clips.  


She followed a few tutorials that she found via Pinterest.  I love how they all turned out; it's hard to pick a favorite!  Let's just say that Emily's curly hair will not go sans cute little hair adornments for a while! 

************

I'm so not used to having to ward off little monsters like this while crocheting.  But I'm not complaining. 


(Look at him, just walking EVERYWHERE now!  So precious.)

Enjoy the rest of your week!

Tuesday, November 22, 2011

Recreate

As I was browsing Pinterest  (surprise, surprise) a few weeks ago, I came across this wreath, thought it was cute, so I decided that it would be the perfect project to adorn our new house!  With a few tweaks, I made my own rendition with green and purple hues.  Here's how to do it:
 
Materials:
   1)  Wreath (I got mine at Micheal's with one of their 40% off coupons for under $5)
   2)  Wooden numbers (you could also do an initial or letters of some sort)
   3)  Paint to paint your numbers/letters
   4)  Glue gun with glue sticks
   5)  Fake flowers (taken off of the stems; also keep some of the leaves to use as a filler) (I got mine from 
        the $1 store and used 3 or 4 bundles)

The process is quite simple:
   1)  Paint your numbers/letters (allow them to dry)
   2)  Start gluing your flowers! (I started randomly placing some leaves towards the edges and then 
        placed the flowers down)  *You might want to place your flowers down before gluing, just to make 
        sure you like the placement.  
   3)  Once all of your flowers are glued down and in place, glue your numbers/letters down.
   4)  Hang your wreath!


My finished Project!

 
This is a really versatile project and can be personalized for gifts as well!  Since the flowers are glued on, you should be able to easily reuse the wreath to change things up a bit from season to season.  (I also thought about using wire to attach the flowers, it just seemed like too much trouble... but that's another option if you know you'll want to reuse the wreath).  It also costs around $10 (if you use your coupons!! : ) )   

Much love,
Stephanie P.

Monday, October 31, 2011

Costumes, Costumes, Costumes!

                         Happy Halloween 

Even though I'm a little bit of a debbie downer this Halloween and do not plan on dressing up, I thought I would share some cute and creative costumes with you to keep in line with the festivities! Maybe I'll steal (I mean... borrow) some of these ideas next Halloween!


{AF Model}

{Homemade Owl Costume}

{Homemade Jellyfish Costume}

{Hoodie Shark Costume}

{'Homeless' Kid}

{Lego Men}

{Pregnant Skeleton}


{Taco Bell Sauces}


{Rock, Paper, Scissors!}


{Loofahs}
**All costumes via Pinterest

Hope you are having a great Monday and an even better Halloween!!

~Stephanie P.

Monday, October 10, 2011

Crispy Southwest Chicken Wraps

{Crispy Southwestern Chicken Wraps}
My first attempt at a dinner inspired by Pinterest was a complete success! I got off work around 5:15 on Friday evening and realized I was going to have a very hungry husband coming home (in about an hour and a half).  So, I turned to pinterest.  I stumbled upon this recipe from mels kitchen cafe and had to try it because it sounded pretty simple, didn't use too many ingredients that I didn't already have, and I knew it could be made in a timely manor (3 pluses for any recipe!).  

I would highly recommend this recipe to anyone in a little bit of a time crunch or if you're simply looking for another recipe to add to your repertoire.  Head on over to mels kitchen cafe for the recipe for these delicious Crispy Southwestern Chicken Wraps (and many more delicious recipes that I might have to try soon).

Enjoy!

Much love,

Stephanie P. 

Friday, September 30, 2011

Inspired by

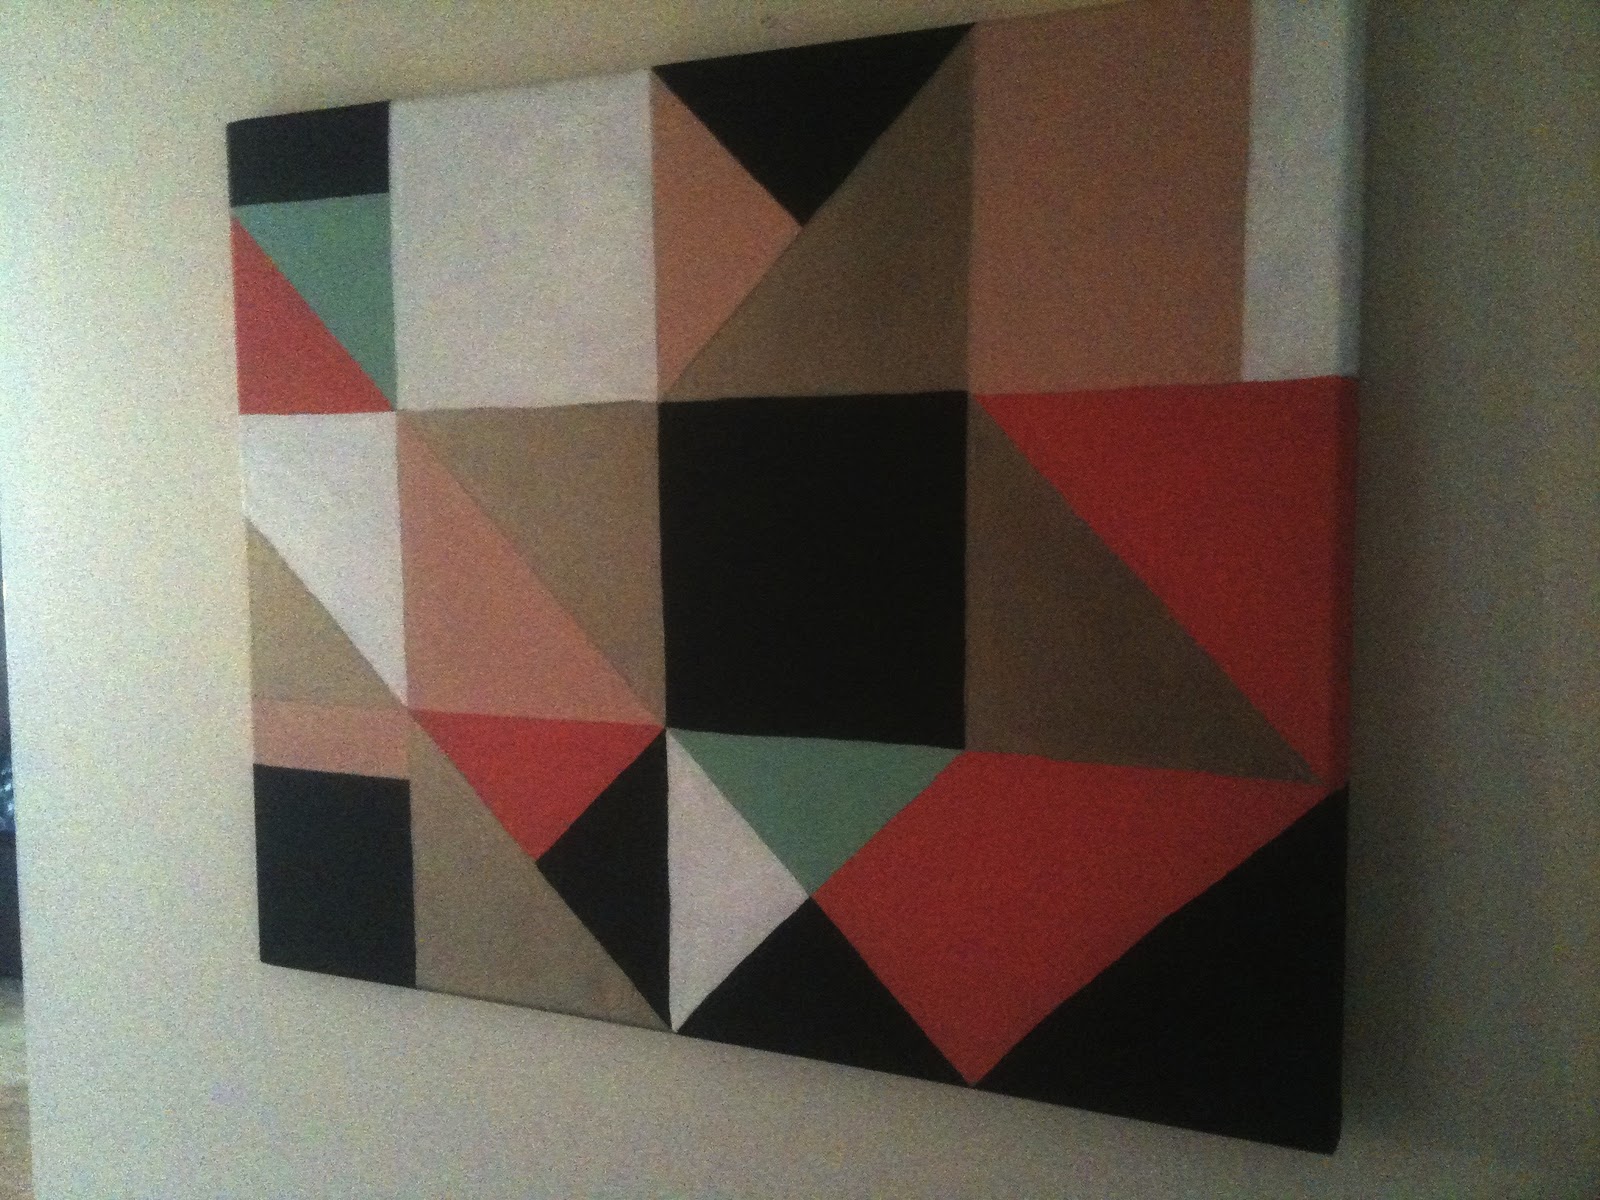
For those of you who don't know, Adam and I are currently in the process of closing on our FIRST HOUSE!  We are so extremely excited for what the future holds for us in our new house (which will hopefully be ours in the next week or so).  We all know what comes along with buying a new place.... DECORATING!  There's nothing more excited to me than possibiliy.  There are soo many possibilities when it comes to decorating a new space to make it your own.  To help keep my mind off of the stresses of closing on a foreclosed home and to keep me from sitting on the couch all day just waiting for a phone call from our realtor telling me, "Today's the day!,"  I've been preoccupying myself by searching for decorating inspiration in stores, onling, and on my favorite site, Pinterest  (If you haven't heard of pinterest, I highly recommend it!  Check it out.).  I've been working on a few little projects here and there, so I decided I would post some ideas on here to hopefully inspire some of you all too.  While I was on Pinterest I saw this living room set-up and fell in love with the geometric artwork.


I was thinking to myself, "hmm... that looks pretty simple.  I bet I could make something like that!"  So, I did. 

{Step 1: Gather materials to draw a grid on the canvas}


{Step 2:  Draw Grid}
The measurements will obviously differ depending on what size canvas you use, but I did three equal sections on the right side to make the equal squares, then sort of freehanded the little section on the left. 

{Step 3:  Choose your paint colors.}
I wanted the painting to match the colors in our front 'reading room' at the new house so I chose black, white, mint green, coral, a light peachy color, and a touch of gold!

{Step 4:  Paint away!}


{The finished product hanging on our wall!}

I cannot wait to find the perfect spot in our new 'reading room' for this painting.  Hope you like it.  Stay tuned for some more craft ideas, room inspiration, and house updates!

Much love,

Stephanie P.